Tuesday, 14 May 2013

Chipboard album & Paris Postcard

Hi you all!
Today I want to share another album I made recently. The covers are made of chipboard, painted with white acrylic and glazed for more durability. The 'love' word is made of wood, and has been in my stash for a long time. I gave it several coats of white acrylic paint, stamped it with my 'love' stamp using archival black and varnished it. It has been fixed on with my hot glue gun (no blisters this time!!)


I lined the inside covers with pink DP, and made a pocket front and back to take tags. I used ric-rac braid for the trim, and the colours of the pocket and tags are repeated in the cardstock used for the pages. I used a good quality, embossed cardstock, which will make a nice background for photos or whatever.


I used black and white spotted ribbon to decorate the covers and rings.


Here is my 'Postcard from France' for the challenge at OOAH Creations. I stamped a collage of Paris images in archival black onto white speciality stamping card, and added a die cut of the Eiffel Tower. I gave it a pop of colour with the red heart.


Have a great day, take care, and thanks a lot for coming by!

Monday, 13 May 2013

Insect Moos and Moo pocket folder

Hi you all! Yesterdays was cold, wet and windy here, so I made the best of it - stayed home and crafted. Left my PJs on all day, ate 2 chocolate biscuits and a slice of cake, and plenty of coffee, so the day turned out quite good!

I made some Moos for our theme of insects. I don't have many insect stamps, and even less in this size, but did manage to find a few. The moo on the cover is a 'real' moo card, which I had printed from a part photo of a hanging I made some time back. Here I have just added the butterflies, fluttering in and out.


The little folder has been made of one sheet of double sided cardstock from My Mind's Eye.
I use the paper with the stripes alternating in both directions, and sometimes inside, sometimes outside the pockets.
For the cover I used some leather look paper from India, and the ribbon and beads were from my stash.


This is a little moo card, made to send as a gift card, which has been stamped and glittered with stickles - I love the quote, too.


Here are 2 more which have been stamped over my printed moos. I had a box full made last year using pictures of my paintings. The left one is part of an abstract, the right one was an attempt to paint like Van Gogh.


Here I have used scraps of marbled paper I made last year, once again stamped and stickled.


These were made from the last scrap of the sheet I used to make the album, once again stamped and stickled


Linking to Moo-Mania

This was a fun project!

Have a great day, stay creative, and thanks a lot for coming by!

Sunday, 12 May 2013

Happy Post and a Moo pocket book

Hi you all, and happy Mother's  Day to all Mums, Moms, Muttis, Mamans, Mamas, Imas etc out there! Have a good day, and let your family look after you!

I received a big envelope in the post, from Petra's Giveaway a few days back. I love all the lovely ribbons, flowers and buttons. 

I especially love the stitched and pleated ribbons, so beautiful!


And this lovely tag came with it, really beautifully made, as is everything she makes.
Thanks a lot Petra!


I am in a mini-book mode just now, and made some more little books. This one is already winging its way into the world, and the others you will see bit by bit.
I used one of my Moo cards to decorate the front, and put some more into the pockets inside. There are 7 pockets inside, which can be used to hold tickets or receipts. It is small - not much bigger than a moo card - and fits snugly into pockets or purses. I used some leather-print paper for the covers.


This was the first Mother's day Card I made for my mum, and probably my first card at all! I was 4 1/2 then, what a long time ago!


Here's wishing you all a great day, take care of yourselves and of your Mums!
Thanks for coming by!

Friday, 10 May 2013

Liberate your Art postcard swap and Paper Saturdays

Hi you all!
First of all a big thank you to Kat for all the hard work she puts into this postcard swap. This swap functions so well, because Kat does all the swapping and mails out the cards. This is the third year running that it has been such a success!
Here are the cards I received:


Pearl (no blogsite given)


and last, but NOT least


Thanks to all who took part, and for the high standard of art involved.


Now to Manon's Paper Saturdays

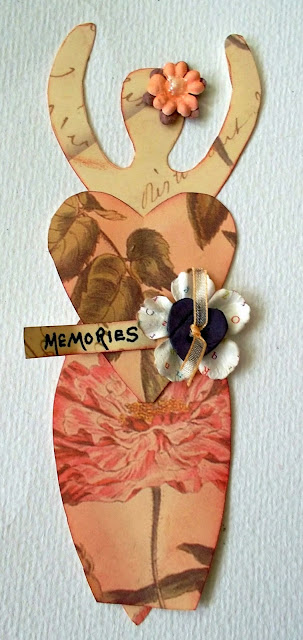
I have made some paper spirit dolls/goddesses), a great way to use up small scraps. You can download the free template (and many others) HERE at Stampington's.


This one just got some little paper scraps instead of a skirt so as not to conceal all of the lovely Graphic45 paper underneath!!


And I have made them into the June page for my calendar.


Okay, enough for today! Have a great weekend, take care, and thanks a lot for coming by!

Thursday, 9 May 2013

Paint Party Friday and Alpha Challenge *A*

Hi you all! I know I am always saying that time flies, but this week went by at supersonic speed, and it's already time for Paint Party Friday, hosted by Eva and Kristin.

I was wanting to show some thoughts to childhood in my journal pages, but as this is something I do not much like dwelling on,  the pages did not turn out as I would have liked. I did manage to finish them, so at least that is something. The figures on the left page have been stamped or made with a template, and deliberately left unclear, as I think the memories we have of people and faces is often vague.


YIKES!!! I just saw that I spelled 'Fragrant' wrongly! Shame on me! Now my journal will forever remind me that I didn't check my spelling! Oh, what an ass I am!!

Linking to Art Journal Journey - challenge yourself.

The orange moon WIP is still not finished. I have added some more colours, but they are hard to catch in the photo.   I will keep trying to get it finished!


For the alpha Challenge at the Craft Barn I chose the word Aboriginal and tried to do some Aboriginal art.
Now I know where the expression 'going dotty' came from!  There are rows of orange dots in between the brown and white ones, but they are not showing up here. I coloured the background using terracotta acrylic paint, applying the paint with a sponge pouncer to keep it dry and give a mottled effect. Then I fussy cut  the leguans(?) lizards or whatever, before going dotty with white, orange and brown pens. I enjoyed making it, in spite of all the dots, and will try something like this another time.


Have a good day you all, take care, and thanks for coming by! 


Tuesday, 7 May 2013

Of soap, buttons and shells....

Hi you all! Today started out warm and sunny, but as I was on my way home this afternoon, it started to rain in torrents. I don't really mind, but I had no umbrella in my car - all 5 in my flat - no jacket, and was wearing sandals....So of course, I did not find a parking place nearby and was soaked by the time I got to the door! But at least it washed all the yellow pollen off my car, so that's something!

At Out of a Hat Creations the ladies want to see a picture frame, and at Pan Pastel Challenge Blog the theme this week is Fairyland. At Simon Says Stamp and Show they want to know what inspires us. This is my try at all three challenges.

I started off with a simple white-wood frame from IKEA. I grabbed one of my Bit-boxes, and shook out all the small bits that were in it. That gave me the angel/fairy - which is a soap! - the flowers, the button, the rosette, the bird and cage, some shells and some leaves. This was my inspiration! I like to use the things I have, and to put them together to make something new and different. It doesn't always have to be new designer stuff. I glued them onto my frame with the hot glue-gun (only one small blister this time), leaving space for the fairy and the unicorn. I sprayed it all silver, and did my stamping while it was drying. Nothing is made of metal, it just looks like it!  The unicorn - LaBlanche - has been stamped onto speciality stamping paper with archival black and fussy cut. The Unicorn did, of course,  have a rear end, which I have saved in case I ever need it! The fairy, wings and hat are stamps from Scrollswork. They have been stamped onto the same paper using clear embossing ink and silver embossed. I glued the fairy so that she is standing on the pile of leaves with the big shell behind her. I added the rose and sequin flowers, and some silver stickles, so that she glitters like a fairy should! The photo is one of my mother with my sister Ruth taken about 1940. I think my sister looks like the little fairy!


Also linking to Make my Monday - any thing that flies

This was a fun make!

Thanks for looking, take care, and have a great day!